🍎Fruit Encyclopedia🍉
Detailed information on all 11 fruits appearing in Suika Game. Complete explanations of size, characteristics, and evolution routes.
📊Fruit Evolution Chart




Click on fruits to view details
Click on fruits to view detailed information
📖Complete guide to the 12 fruits
A full guide to all 11 fruits in Suika Game, from physics to how to use each one.

CherryLv.0
The smallest fruit that appears when the game starts. Light and easy to handle.
⚙️Physical properties
- Density: 0.8
- Bounce: 0.8
- Friction: 0.3
- Restitution: 0.6
🔄Evolution
- Evolves from: Starting fruit
- Evolves into: Strawberry
- Required: 2pcs
- Place in the evolution chain: 1/11
📊Difficulty
- Control difficulty:⭐⭐⭐⭐⭐
- Merge difficulty:⭐⭐⭐⭐⭐
- Strategic value:⭐⭐⭐⭐⭐
💡Pro tips
- Ideal placement: Keep it at the edge and merge quickly
- Merge technique: Drop two or more at once so they evolve efficiently
- ✓Put the first 3 on the two edges to start the base
- ✓Four cherries can evolve all the way to a grape
- ✓Merge in mid-air to choose where the result lands
⚠️Common mistakes
- • Dropping it in the center, where it gets in the way later
- • Hoarding them instead of merging
- • Placing them at random without aiming

StrawberryLv.1
Evolution of cherry. Small but has presence.
⚙️Physical properties
- Density: 0.85
- Bounce: 0.75
- Friction: 0.32
- Restitution: 0.55
🔄Evolution
- Evolves from: Cherry
- Evolves into: Grape
- Required: 2pcs
- Place in the evolution chain: 2/11
📊Difficulty
- Control difficulty:⭐⭐⭐⭐⭐
- Merge difficulty:⭐⭐⭐⭐⭐
- Strategic value:⭐⭐⭐⭐⭐
💡Pro tips
- Ideal placement: Drop it onto a cherry and merge immediately
- Merge technique: Aim for the grape as fast as you can
- ✓Two strawberries use the same space as one grape
- ✓Bounce it off the wall to fine-tune the landing
⚠️Common mistakes
- • Placing it far away from the cherries
- • Stockpiling several with no plan

GrapeLv.2
Beautiful purple medium-sized fruit. Balanced type.
⚙️Physical properties
- Density: 0.9
- Bounce: 0.7
- Friction: 0.35
- Restitution: 0.5
🔄Evolution
- Evolves from: Strawberry
- Evolves into: Tangerine
- Required: 2pcs
- Place in the evolution chain: 3/11
📊Difficulty
- Control difficulty:⭐⭐⭐⭐⭐
- Merge difficulty:⭐⭐⭐⭐⭐
- Strategic value:⭐⭐⭐⭐⭐
💡Pro tips
- Ideal placement: Use it to fill gaps in the middle layers
- Merge technique: Evolve it into a tangerine to start the medium fruits
- ✓Grapes are the best fruit for adjusting size
- ✓Against a wall, they sit much more steadily
⚠️Common mistakes
- • Placing it under a large fruit so it gets crushed
- • Holding 3 or more grapes at once

TangerineLv.3
Bright orange tangerine. For intermediate players.
⚙️Physical properties
- Density: 0.95
- Bounce: 0.65
- Friction: 0.38
- Restitution: 0.45
🔄Evolution
- Evolves from: Grape
- Evolves into: Orange
- Required: 2pcs
- Place in the evolution chain: 4/11
📊Difficulty
- Control difficulty:⭐⭐⭐⭐⭐
- Merge difficulty:⭐⭐⭐⭐⭐
- Strategic value:⭐⭐⭐⭐⭐
💡Pro tips
- Ideal placement: Set it on the second or third layer from the bottom
- Merge technique: Evolving into an orange is how the score starts to climb
- ✓Fill the gap between two tangerines with a small fruit
- ✓It can also work as part of the bottom base
⚠️Common mistakes
- • Putting it on the top layer and making the stack shaky
- • Mixing it up with an orange and placing it wrong

OrangeLv.4
Vibrant orange fruit. Handling becomes difficult.
⚙️Physical properties
- Density: 1
- Bounce: 0.6
- Friction: 0.4
- Restitution: 0.4
🔄Evolution
- Evolves from: Tangerine
- Evolves into: Apple
- Required: 2pcs
- Place in the evolution chain: 5/11
📊Difficulty
- Control difficulty:⭐⭐⭐⭐⭐
- Merge difficulty:⭐⭐⭐⭐⭐
- Strategic value:⭐⭐⭐⭐⭐
💡Pro tips
- Ideal placement: Always keep it within the bottom two layers
- Merge technique: Check the spot carefully before evolving into an apple
- ✓Its weight sits low, so the bottom is the right spot
- ✓Two oranges into one apple saves a lot of space
- ✓Against a wall, it stays much steadier
⚠️Common mistakes
- • Placing it high and setting up a collapse
- • Holding 4 or more oranges at once
- • Forcing it into a gap that is too narrow
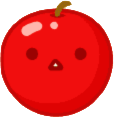
AppleLv.5
Red apple. Joins the large fruit category from here.
⚙️Physical properties
- Density: 1.05
- Bounce: 0.55
- Friction: 0.42
- Restitution: 0.35
🔄Evolution
- Evolves from: Orange
- Evolves into: Pear
- Required: 2pcs
- Place in the evolution chain: 6/11
📊Difficulty
- Control difficulty:⭐⭐⭐⭐⭐
- Merge difficulty:⭐⭐⭐⭐⭐
- Strategic value:⭐⭐⭐⭐⭐
💡Pro tips
- Ideal placement: Lock it on the bottom, in the center or at either edge
- Merge technique: Evolving into a pear is the key to the late game
- ✓The apple is the last piece of a solid base
- ✓Tuck a small fruit between two apples to steady them
- ✓When you evolve into a pear often decides the game
⚠️Common mistakes
- • Placing it above the middle and making the stack unstable
- • Dropping 3 or more apples with no plan
- • Leaving too much space around small fruits

PearLv.6
Green pear. Large and heavy advanced fruit.
⚙️Physical properties
- Density: 1.1
- Bounce: 0.5
- Friction: 0.45
- Restitution: 0.3
🔄Evolution
- Evolves from: Apple
- Evolves into: Peach
- Required: 2pcs
- Place in the evolution chain: 7/11
📊Difficulty
- Control difficulty:⭐⭐⭐⭐⭐
- Merge difficulty:⭐⭐⭐⭐⭐
- Strategic value:⭐⭐⭐⭐⭐
💡Pro tips
- Ideal placement: It must sit on the bottom layer and act as the base
- Merge technique: Evolving into a peach is one of the hardest moves
- ✓It is among the heaviest fruits, so keep it on the bottom
- ✓Wait carefully before merging two pears
- ✓Only small fruits should sit on top of a pear
⚠️Common mistakes
- • Placing it above the second layer and ending the game
- • Making 3 pears and running out of space
PeachLv.7
Pink peach. Gateway to high-scoring fruits.
⚙️Physical properties
- Density: 1.15
- Bounce: 0.45
- Friction: 0.48
- Restitution: 0.25
🔄Evolution
- Evolves from: Pear
- Evolves into: Pineapple
- Required: 2pcs
- Place in the evolution chain: 8/11
📊Difficulty
- Control difficulty:⭐⭐⭐⭐⭐
- Merge difficulty:⭐⭐⭐⭐⭐
- Strategic value:⭐⭐⭐⭐⭐
💡Pro tips
- Ideal placement: Put it in the center of the bottom layer and never move it
- Merge technique: Evolving into a pineapple is a mark of an advanced player
- ✓After you make a peach, wait for the merge in that same spot
- ✓Pack small fruits around it to keep it steady
⚠️Common mistakes
- • Trying to move the peach and collapsing the stack
- • A risky plan that holds two or more peaches at once
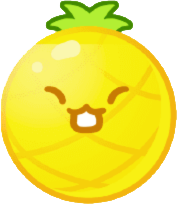
PineappleLv.8
Yellow pineapple. Quite large fruit.
⚙️Physical properties
- Density: 1.2
- Bounce: 0.4
- Friction: 0.5
- Restitution: 0.2
🔄Evolution
- Evolves from: Peach
- Evolves into: Melon
- Required: 2pcs
- Place in the evolution chain: 9/11
📊Difficulty
- Control difficulty:⭐⭐⭐⭐⭐
- Merge difficulty:⭐⭐⭐⭐⭐
- Strategic value:⭐⭐⭐⭐⭐
💡Pro tips
- Ideal placement: Lock it in the steadiest spot on the bottom layer
- Merge technique: Evolving into a melon is extremely hard
- ✓When you make a pineapple, already reserve the melon's spot
- ✓Only the smallest fruits should sit around a pineapple
⚠️Common mistakes
- • Moving the pineapple before you build the second one
- • Forgetting to save space for the pineapple
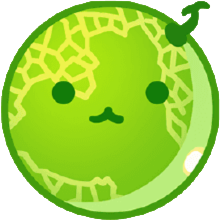
MelonLv.9
Green melon. One step before super large fruit.
⚙️Physical properties
- Density: 1.25
- Bounce: 0.35
- Friction: 0.52
- Restitution: 0.15
🔄Evolution
- Evolves from: Pineapple
- Evolves into: Watermelon
- Required: 2pcs
- Place in the evolution chain: 10/11
📊Difficulty
- Control difficulty:⭐⭐⭐⭐⭐
- Merge difficulty:⭐⭐⭐⭐⭐
- Strategic value:⭐⭐⭐⭐⭐
💡Pro tips
- Ideal placement: Treat it as the center of the board and put it in the middle of the bottom
- Merge technique: The last step into a watermelon is legendary difficulty
- ✓Do not move the melon. Focus on building the second one
- ✓Making a melon means the late game has started
⚠️Common mistakes
- • A bad first melon makes the second one impossible
- • Failing to keep space around the melon
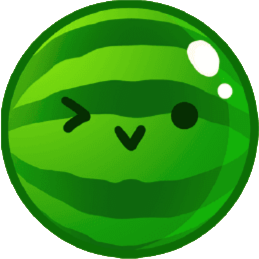
WatermelonLv.10
The ultimate goal watermelon. Largest size with highest score.
⚙️Physical properties
- Density: 1.3
- Bounce: 0.3
- Friction: 0.55
- Restitution: 0.1
🔄Evolution
- Evolves from: Melon
- Evolves into: Final form
- Required: 2pcs
- Place in the evolution chain: 11/11
📊Difficulty
- Control difficulty:⭐⭐⭐⭐⭐
- Merge difficulty:⭐⭐⭐⭐⭐
- Strategic value:⭐⭐⭐⭐⭐
💡Pro tips
- Ideal placement: If you can make one, the win is basically locked in
- Merge technique: The watermelon is the final goal and a new start
- ✓One watermelon is enough. A second one is extremely hard
- ✓After it appears, chain small fruits to keep scoring
- ✓It never disappears, so it is a permanent base
⚠️Common mistakes
- • Relaxing after the watermelon and then losing
- • Going for a second watermelon and failing
🎯Merge route strategies
Three merge routes by difficulty. Pick a plan that fits you, from beginner to advanced.
Side stack
The simplest plan: push fruits to one side and stack them. Recommended for beginners.
Steps:
- 1Pile small fruits against the right edge→ A stable base
- 2Grow them larger from the bottom upward→ A steady supply of medium fruits, up to apples
- 3Keep the left side free for emergency adjustments→ A lower chance of game over
✓Advantages
- • Simple and easy to understand
- • Stable, and hard to mess up
✗Disadvantages
- • Hard to chase a high score (about 3000 on average)
Pyramid build
An intermediate plan: put large fruits in the center and pack small fruits around them.
Steps:
- 1Place medium and large fruits at the bottom center→ A balanced layout
- 2Stack small fruits up both sides like stairs→ A steady supply of pears and peaches
- 3Grow the center larger, and keep merging on the sides→ Scores around 5000
✓Advantages
- • A reliable way to reach a mid-range score
- • A relatively low chance of collapse
✗Disadvantages
- • Needs accurate drops
Layer control
An advanced plan that manages fruit size on each layer. This is how you chase the highest scores.
Steps:
- 1Reserve the bottom layer for large fruits only→ A more efficient layout
- 2Use the middle layer as the merge space for medium fruits→ Production at pineapple and melon size
- 3Cycle small fruits quickly on the top layer→ A real chance of reaching a watermelon
- 4Let the layers feed each other so fruits grow efficiently→ High scores of 8000 or more
✓Advantages
- • The only route aimed at the top scores
- • Makes the best use of space
- • The full set of advanced techniques
✗Disadvantages
- • Needs very precise control
- • One mistake can end the run
⚙️Physics of each fruit
Each fruit's physics in numbers: density, bounce, friction, and how to use that in play.
| Fruit | Size class | Density | Bounce | Friction | Stability |
|---|---|---|---|---|---|
 Cherry Cherry | Tiny | 0.80 | 0.80 | 0.30 | ●●●●● |
 Strawberry Strawberry | Tiny | 0.85 | 0.75 | 0.32 | ●●●●● |
 Grape Grape | Small | 0.90 | 0.70 | 0.35 | ●●●●● |
 Tangerine Tangerine | Small | 0.95 | 0.65 | 0.38 | ●●●●● |
 Orange Orange | Medium | 1.00 | 0.60 | 0.40 | ●●●●● |
 Apple Apple | Medium | 1.05 | 0.55 | 0.42 | ●●●●● |
 Pear Pear | Medium | 1.10 | 0.50 | 0.45 | ●●●●● |
 Peach Peach | Large | 1.15 | 0.45 | 0.48 | ●●●●● |
 Pineapple Pineapple | Large | 1.20 | 0.40 | 0.50 | ●●●●● |
 Melon Melon | Huge | 1.25 | 0.35 | 0.52 | ●●●●● |
 Watermelon Watermelon | Huge | 1.30 | 0.30 | 0.55 | ●●●●● |
🎾How bounce changes play
A higher bounce value means the fruit rebounds farther after a hit.
- • Cherry (0.8) bounces the most and is the hardest to place
- • Watermelon (0.3) barely bounces and makes a stable base
- • Putting low-bounce fruits on the bottom is the basic plan
📏Why friction matters
Higher friction means the fruit slides less and stays put.
- • Watermelon (0.55) slides the least
- • Cherry (0.3) slides easily, so drop it against a wall
- • High-friction fruits stay stable even on a slope
⚖️Density and weight
Higher density means a heavier fruit that sinks toward the bottom.
- • Density rises in steps from 0.8 (cherry) to 1.3 (watermelon)
- • A heavy fruit on top sharply raises the chance of a collapse
- • Placing by density, layer by layer, is an advanced technique
🌀Spin and stability
Higher angular damping means the fruit spins less and stays stable.
- • Larger fruits have stronger angular damping and stay steadier
- • Small fruits spin easily, so give them a solid contact patch
- • There is also a fine-control trick that uses the spin
🌱Placement tips for beginners
If you just started Suika Game, these six placement tips cover the basics.
1Use both edges
The two edges, right against the walls, are the most stable spots. Always drop the first fruits at an edge.
2Save the center for later
The center is hard to adjust. Avoid it early, and use it after you have medium or large fruits.
3Keep large fruits at the bottom
Oranges and anything larger must stay within the bottom two layers. Higher up, they topple the stack.
4Keep matching fruits together
Put fruits you want to merge next to each other. The same fruit on opposite sides is wasted.
5Slow down and aim
When the next fruit appears, check the landing spot before you drop. Do not rush.
6Do not leave gaps
Do not leave empty gaps between fruits. A tight pack is how you score high.
⚠️Mistakes beginners often make
✗ Dropping small fruits in the center
The center is hard to fix later. Start small fruits against the walls.
✗ Placing large fruits near the top
An apple or larger fruit above the third layer will very often collapse the stack.
✗ Scattering matching fruits
Fruits you want to merge must sit next to each other. Spreading them wastes the chance.
✗ Ignoring the next fruit
Dropping without checking the next fruit misses merges and can topple the stack.
❓Frequently Asked Questions
Common questions about Suika Game fruits, answered by topic.
Basics
What is the difference between a cherry and a strawberry?▼
 Cherry
 Strawberry
How do I make a watermelon?▼
 Watermelon
Which fruit is the most efficient for points?▼
Strategy
Which fruits should I merge first?▼
 Orange
 Apple
AppleShould I make the pear or the peach first?▼
 Pear
Pear Peach
PeachHow do I tell a tangerine from an orange?▼
 TangerineOrange
Physics
How do I stop fruits from bouncing?▼
Cherry Grape
GrapeWhy are the pineapple and melon so big?▼
 Pineapple
 Melon
MelonAdvanced
How should I place apples, pears, and peaches?▼
ApplePearPeachCan I make two watermelons?▼
WatermelonWant to learn more?
If you want more detail on how to use each fruit, see these guides too.
💡Fruit Strategy Tips
Merging Techniques
When identical fruits touch, they merge into higher-level fruits
Using Physical Properties
Understand each fruit's size and weight to optimize placement
Placement Strategy
Place large fruits at the bottom, small fruits at the top
Score Maximization
Aim for consecutive merges for bonus points